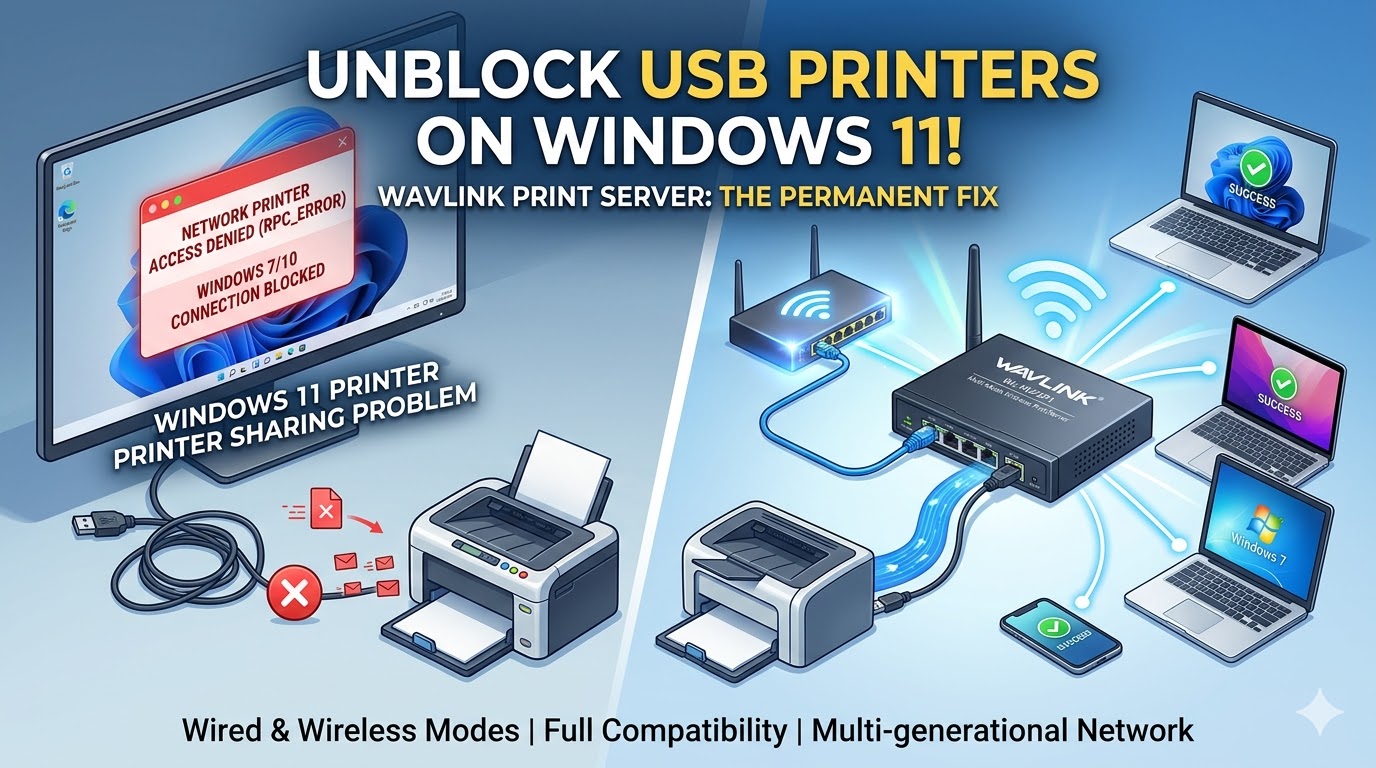
Upgrading to Windows 11 brings a modern interface, but tightened RPC (Remote Procedure Call) security mechanisms have inadvertently turned USB-shared printers into isolated “islands.” The situation where Windows 11 hosts refuse connections from workstations running Windows 7, 8, or 10 is causing printing bottlenecks in many offices and companies, especially for color printer models that do not support LAN ports.
Instead of replacing your equipment, this article dives straight into a practical solution to break down security barriers and “unclog” connections for your multi-generational computer system.
The definitive solution I want to share is the WAVLINK – Multi-mode Wireless Print Server. This is not just an ordinary adapter, but a professional “transit hub” that fully supports USB, LAN, and WiFi, compatible with everything from Windows and Mac to the RAW protocol. When Windows 11 becomes too restrictive, connecting the printer directly to the local network via WAVLINK transforms a device that originally only had a USB port into an independent network printer.
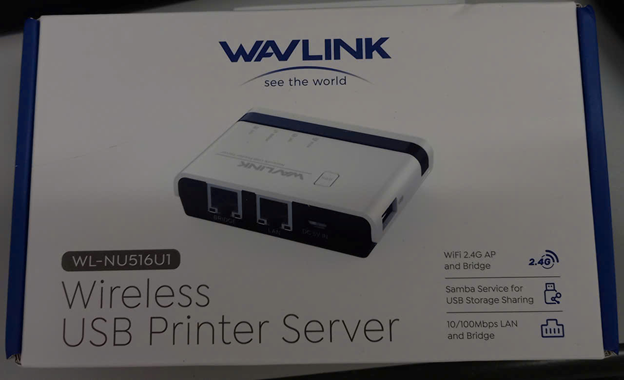
First, we proceed to unbox the product. The complete WAVLINK kit includes: the Print Server device itself, a power adapter, and a LAN cable. As soon as you have it in hand, you need to perform the basic physical connections: attach the power adapter to the device and use the LAN cable to connect the WAVLINK’s LAN port to an available port on your office’s Switch or Router.
Once the signal lights on the device have stabilized, we enter the most important stage: Software Configuration. This stage can be performed via a smartphone or a laptop that supports WiFi connectivity.
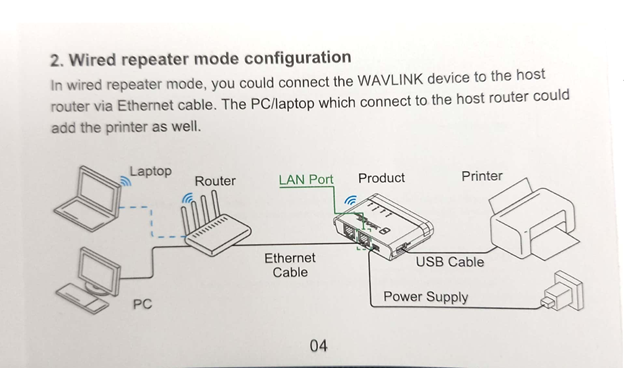
This WAVLINK device supports two operating modes: wired and wireless. However, in this guide, I will focus on the Wired Repeater Mode.
Based on my experience, in an office environment with many users sharing a single printer (for example, one color printer shared among 10-20 workstations), using a wired LAN connection provides a much stronger network and significantly faster printing speeds compared to a wireless connection. Print files—especially color ones—often have large capacities; a LAN connection ensures that print commands are transmitted instantly and stably, without the interruptions or hung commands often seen with WiFi. You can refer to the Wired Repeater connection diagram below. However, if your office is not convenient for cabling, you can absolutely set it up similarly using the Wireless Repeater Mode Configuration.
Part 1: Printer Server Configuration – WAVLINK
The configuration process is carried out sequentially through the following steps:
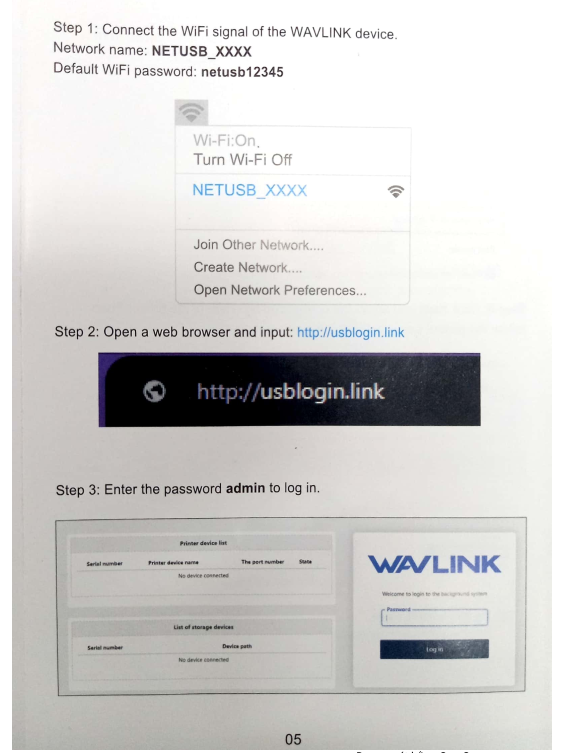
Step 1: Connect to the Configuration Network Use a smartphone or laptop to find and connect to the WiFi signal emitted by the WAVLINK device.
- Network name:
NETUSB_XXXX(where XXXX is the unique code of your device). - Default password:
netusb12345
Step 2: Access the Admin Page Open a web browser (e.g., Chrome, Safari, Edge) and enter the address: http://usblogin.link into the address bar.
Step 3: Login When the login screen appears, enter the default password admin to log in to the management interface.
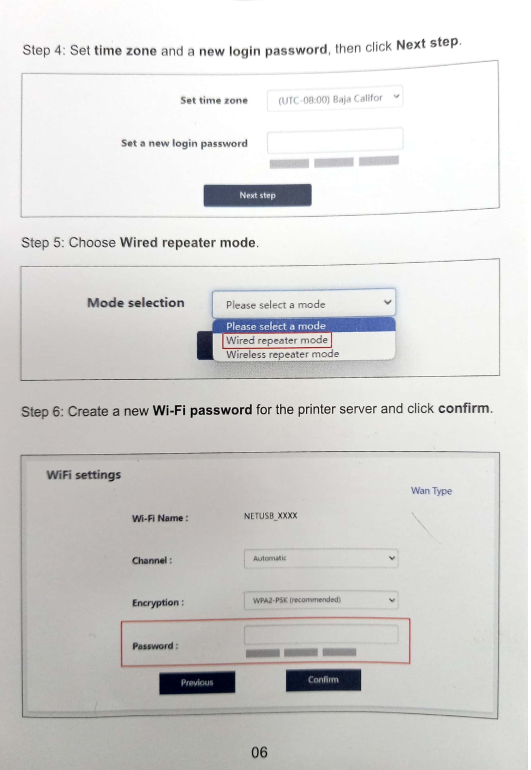
Step 4: Set Time Zone and New Login Password The system will prompt you to set the Time Zone and a New login password. This is a crucial security step; choose a password that is easy for you to remember but difficult for others to guess. Once entered, click Next step.
Step 5: Select Operating Mode (Wired Repeater Mode) The Mode selection screen will appear with a dropdown list. Select Wired repeater mode as planned to ensure optimal printing speed. Click Next step.
Step 6: Configure WiFi Security and Confirm This step involves setting the WiFi password for the network emitted by the Print Server itself. Enter your desired WiFi password into the Password field and click Confirm. The system will save your configuration and reboot.
Step 7: Reconnect to the Configuration WiFi Since we just changed the login password and operating mode, the Print Server will reboot and broadcast WiFi with new parameters. You need to use your phone or laptop to reconnect to the NETUSB_XXXX WiFi signal once more.
Step 8: Log in again to check network parameters and record the IP address After reconnecting, open your browser and access the admin page at http://usblogin.link again. This time, use the New login password you created in Step 4.
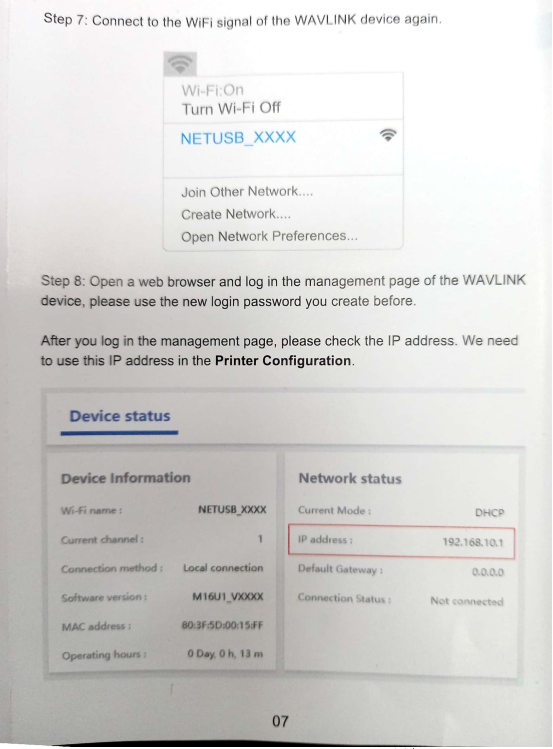
Once you have entered the administration page, observe the Device status box, specifically the Network status section. Here, you will see the IP address line followed by a string of numbers (for example: 192.168.10.1 as shown in the image).
Important: You must ACCURATELY RECORD this IP Address. This is the unique address of the Print Server on the network, and we will need it to configure the printer on each computer in the following section.
Part 2: Configuring the EPSON L1800 Printer on Windows 11 via TCP/IP Protocol
Once you have obtained the IP address of the WAVLINK device (as instructed in Part 1), the next step is to install the printer onto the Windows 11 Pro operating system. In this article, I am performing the actual setup on the EPSON L1800 color printer series.
Important note before installation: You must visit the printer manufacturer’s official website and download the correct driver for your current operating system (32-bit or 64-bit). In this case, I have already downloaded the EPSON L1800 driver and extracted it to a folder on my computer.
Detailed Implementation Process:
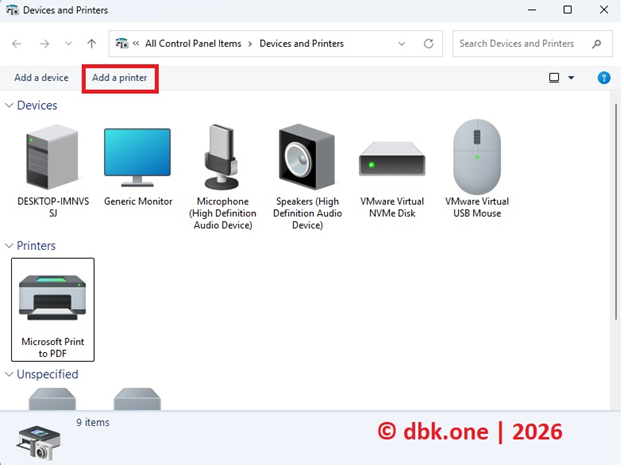
Step 1: Open the Printer Manager Go to Control Panel > Devices and Printers. On the toolbar at the top, select Add a printer.
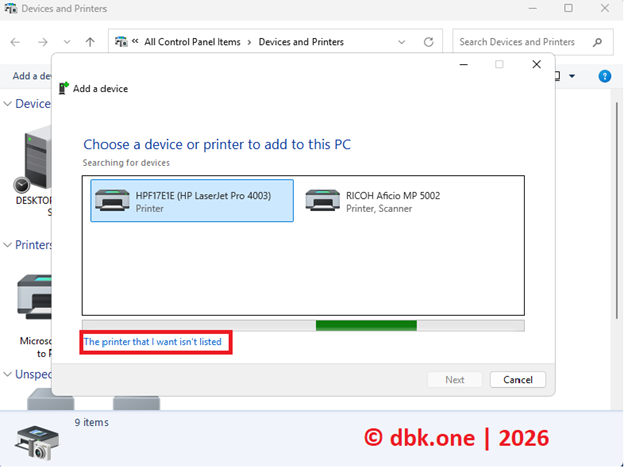
Step 2: Select Manual Printer Addition The system will automatically scan, but it usually will not immediately find the printer through the Print Server. Click on the blue text: The printer that I want isn’t listed.
Step 3: Select Connection via IP Address In the window that appears, select the third option: Add a printer using an IP address or hostname and click Next.

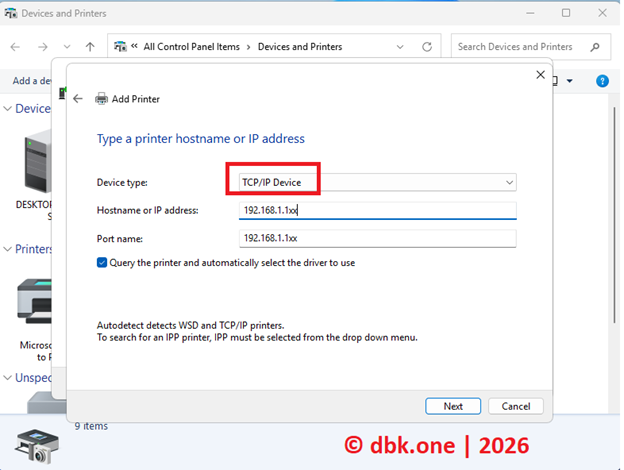
Step 4: Enter WAVLINK Network Parameters This is a decisive step. You need to fill in the following information:
- Device type: Select TCP/IP Device.
- Hostname or IP address: Enter the exact IP address you obtained from the Network status section in the device administration panel (e.g.,
192.168.1.xx).
Click Next to continue
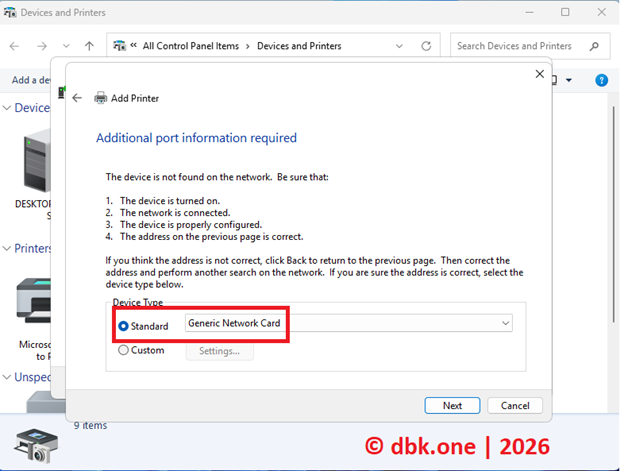
Step 5: Confirm Connection Port In case Windows requests Additional port information, under the Device Type section, select Standard and leave it at the default Generic Network Card, then click Next.
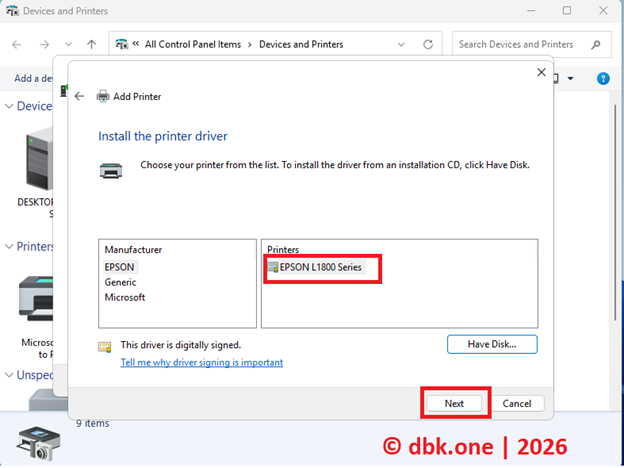
Step 6: Driver Installation (Handling Missing Drivers in the List)
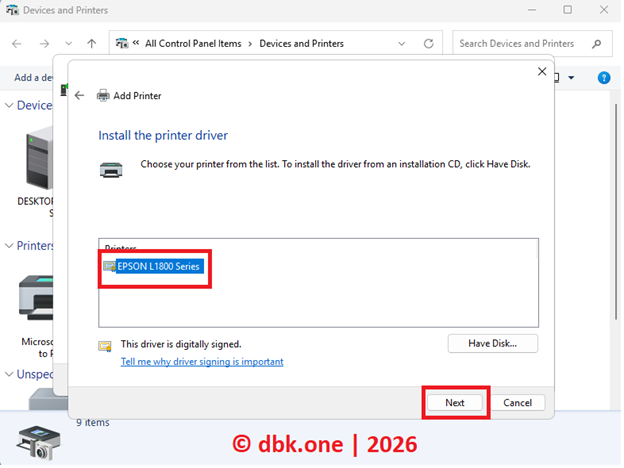
On the Install the printer driver screen:
- If the printer name you need is already available in the Manufacturer and Printers list, select it and click Next.
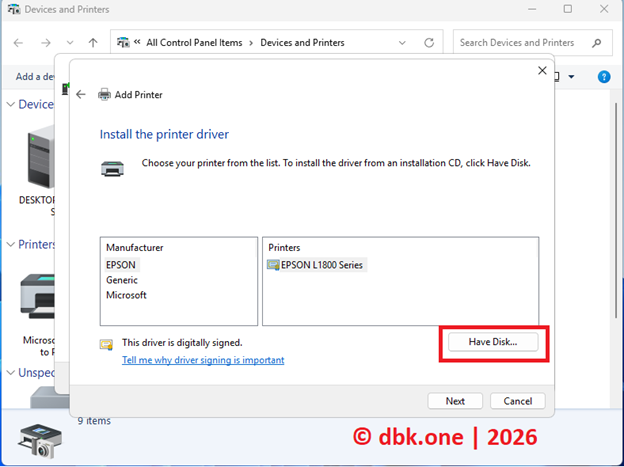
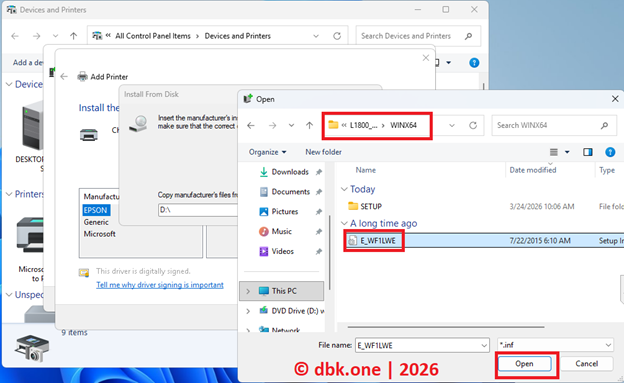
- If the printer is not listed: Click the Have Disk… button. Then, click Browse… and navigate to the folder where you previously extracted the driver. Locate the file with the .inf extension (e.g.,
E_WF1LWE.inf) and click Open.
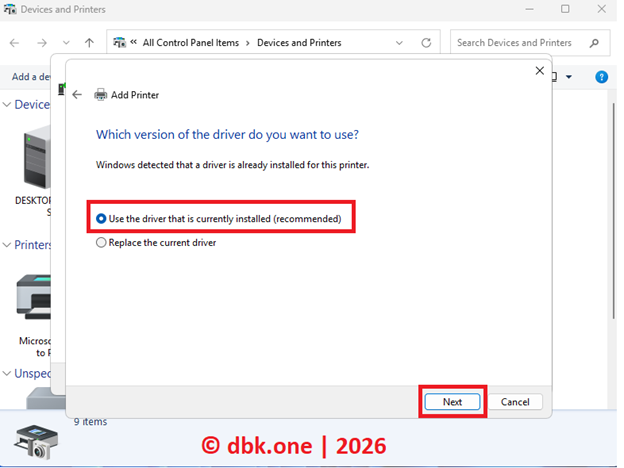
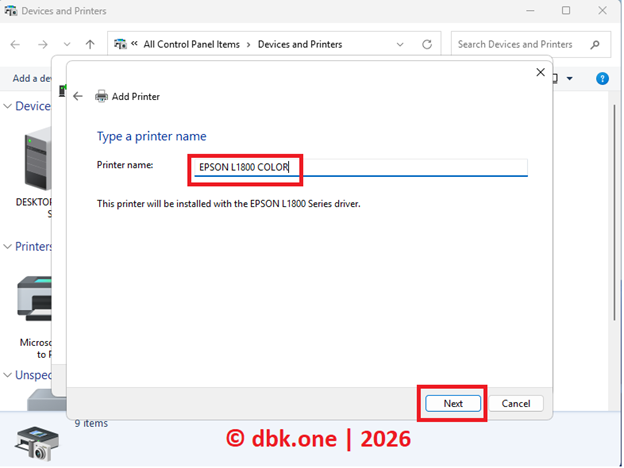
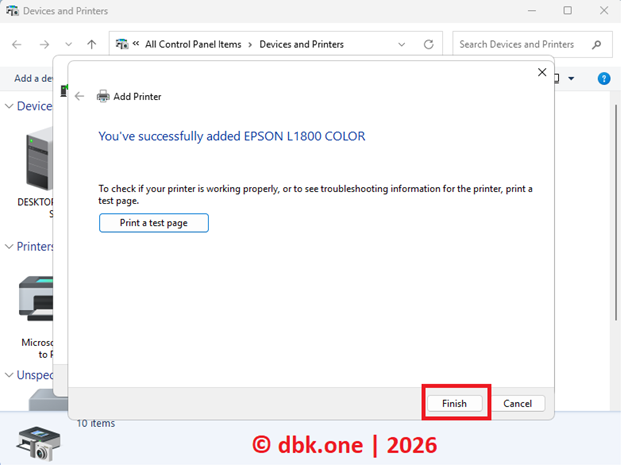
Step 7: Finalize Naming and Verification The system will ask which driver version you want to use; select Use the driver that is currently installed. Next, you can rename the printer (e.g., EPSON L1800 COLOR) for easier identification.
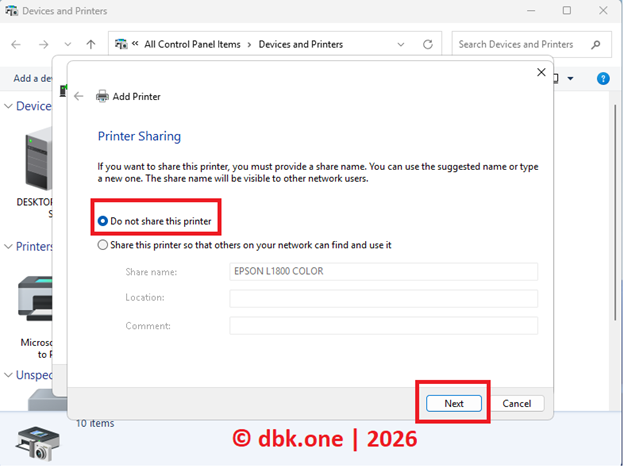
At the Printer Sharing step, select Do not share this printer because we are connecting directly via IP, so there is no need to share it through the computer again. Finally, click Finish.
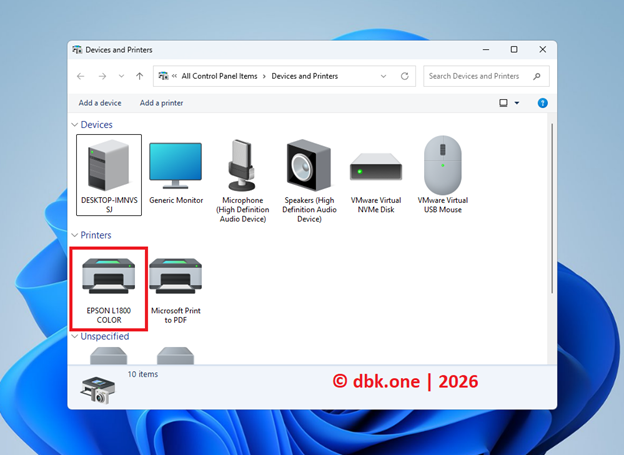
Final Result
Now, in the Devices and Printers section, you will see the EPSON L1800 COLOR printer icon appear, and it is ready for operation.
Conclusion
Using the WAVLINK Wireless Print Server is an extremely effective solution for bypassing the security barriers of Windows 11. No more connection error codes, and no more being blocked by RPC updates. With just a few steps to configure the IP address, you can achieve smooth and stable printing for your entire office.